5 days natural dyeing at Sturt summer school was an enjoyable way to start the new year.
The course was interesting although I already knew much of what was taught. I went for several reasons; I’ve never really had a reliable method of getting a good green dye colour from plant material as they usually turn to browns and greys: I wanted to explore natural dyeing on paper again and I was interested in more linear and random patterns/colours than just transferring plant images/stencils to cloth and paper.
The results were mixed, some people had very vibrant sharp marks/patterns whilst others came out more sludgy and with fuzzy imagery. I’ve always used silk in previous classes but learned that wool cloth produces stunning results with excellent colour pick-up. I didn’t have any, so relied on silk noil and cotton. Different paper types gave enormous variations in outcome.
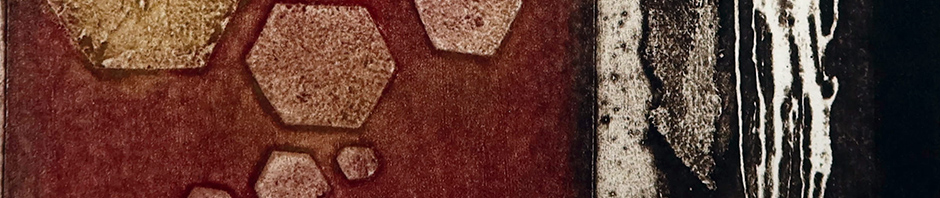
 Above: Eucalyptus bark pot with copper mordant results. Top – 185gsm and 300gsm Arches watercolour paper. Bottom – 250gsm Somerset print paper.
Hard to believe the two sets of dyed papers shown above were treated in exactly the same way; both with similar plant material, the same resist between layers to stop dye seepage, both tied tightly between the same tiles and in the pot together and for the same length of time.
 Above: Plant impressions on Canson watercolour paper, around 200-250gsm.
Lesson learned:
The type of paper used makes or breaks the results. The best outcomes were those using Canson watercolour paper.
We worked with around 11 pots of different plant material including various Eucalyptus leaves and bark, American Ash, red cabbage, Bottlebrush, Purple Plum, Wattle, Oak, Maple, Smokebush, Cinerea and Rosemary. Each pot was boiled, samples of the colours were taken and different mordants were added to see what colours would evolve.
 Lesson learned:
 Mark jars with the type of mordant to be added (alum, copper sulphate or iron sulphate in our case).
Once main pot has boiled and colour achieved put a little of the liquid into each jar and add a smidge of mordant, add fabric scraps to jars (we used silk noil) and continue to boil the pot with the jars for another hour.
Remove the fabric samples and choose which colour you wish to work with. Add that mordant to the main pot, boil and add fabric or paper to dye.
We brushed egg white onto the underside of plant material before lying it onto fabrics, folding, securing and dyeing. This increases the protein level and produces a better colour and pattern transfer.
 Above: Brushing the underside of leaves with egg white before placing onto fabric. Cloth impressed with Eucalyptus Cinerea leaves.
Lesson learned:
Never, never do this with plant material that is going onto paper as the egg white turns to glue and leaves cannot be easily removed, thereby ruining the pattern. Yes, it’s the second time I’ve done it without thinking in advance – what a pain. Won’t do it again!
 Above: Yep, what a mess!
Here are some of my better results, on paper, cotton fabric and silk noil.
 Folded and dyed silk noil, overdyed using arashi method on pole.
 Top: Dyed BFK Reeves print paper. Bottom: Dyed silk noil
 Both pieces: 300gsm watercolour paper, dyed using torn leaves, pine needles, twigs and bark.
 Left: Ferns on cotton fabric with green dyed silk noil (achieved in Rosemary pot). Right: Silk noil with very thick layers of plant material embossed into the surface.
 Large piece of cotton fabric (and close-up sections), folded and secured between wooden blocks. Patterning achieved by inserting pine needles between layers.
Overall a fun week with a bunch of lovely classmates. I learned a lot from them and the tutor, so next time I try this I’ll have some new ideas to experiment with.
