Jet James workshop and research
A couple of weeks ago I attended an experimental collagraph workshop with Queensland artist Jet James. My first impression of him was how seemingly shy and unassuming he is. A quiet, organised, unhurried man, working and teaching calmly, and generously passing on his amazing knowledge and insight into his printing art. He held nothing back and answered every query, allowed photos of his work and told us of his history and development as an artist.
Whilst studying, he and his mentor worked for two years to develop his unique collagraph approach, searching for the right base on which to work. So, over two days, I was lucky enough to be introduced to his own original method of printing and encouraged to experiment freely.
Using 3mm PVC foamex board we placed a variety of items onto the surface and ran it through the press on a tight pressure. This indented the plastic and the items were removed to be used again.
We continued to work into the surface (perhaps having drawn a design first, as I did) by carving, scratching and sanding. I’ve made the photo deliberately dark so hopefully some of the indented marks can just about be seen.
Then we started building the surface up. I placed crumpled masking tape on the PVC before slashing it with a blade.
Jet also showed us how to use nail varnish pens to draw onto the surface. These pens are great, you can achieve a lot of control and draw quite precisely. We also looked at applying clear gel medium as either a glue to stick items to the board, to encase pieces onto the board or to use as a texture itself. Many other quite strange products were discussed such as car spray undercoat, autopaint pens, welding powder and water mixture, shellac, silk-screen block-out mixed with carborundum – all of which create ink resists.
Some participants adhered papers and fabrics to their board, but I started with masking tape and nail varnish pen.
Ink was applied to the surface using a spatula (or old credit card) until the whole board was covered. As much as possible was scraped off the surface, then wiped away with paper, leaving ink mainly in the recesses and also on or within the surface collaged items.
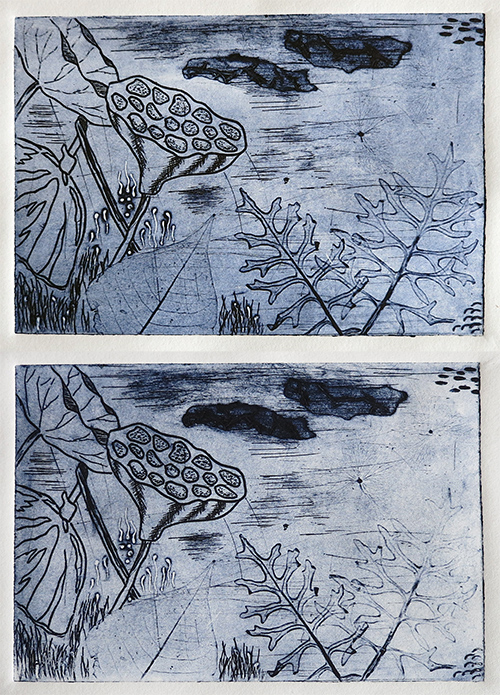
 My two initial prints showing differing amounts of ink remaining after the wiping process.
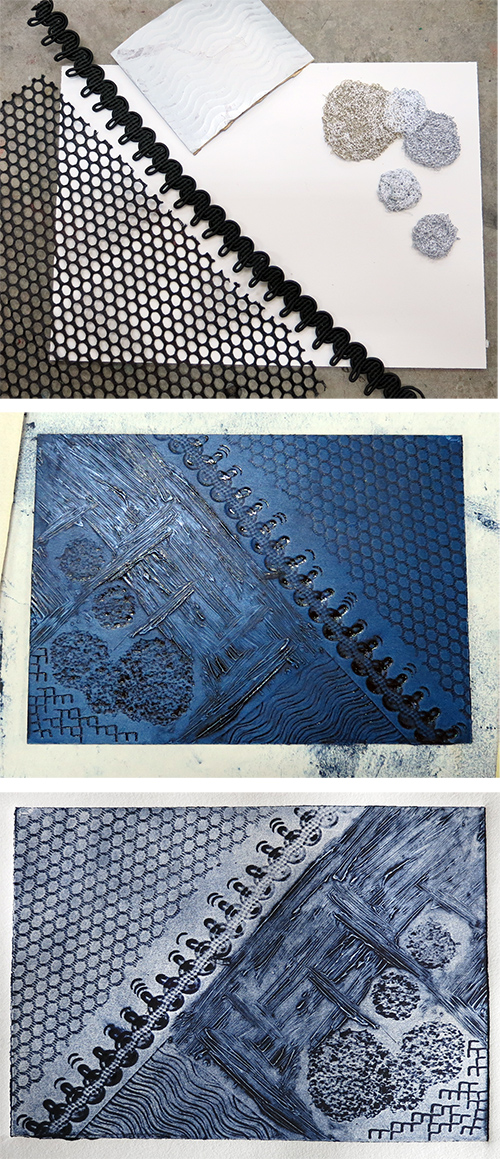
My second print plate was an abstract bit of fun my husband likes to call The Zipper. I’ve shown the initial layout of the components before going though the press. Clear gel medium was then applied to the surface with a toothbrush and, using the ends of my carving tools, I made curved and V-shaped cuts in the surface. The gel was allowed to dry before inking up, and the final photo is the finished image.

 By this stage I’d freed up a bit and decided to go for something twice the size. I chose the subject matter and title as ‘An invisible Still Life’ seeing as it was only in my head and everyone else would only see the end result! However, I managed a quick sketch as a general concept.
My natural tendency is to go with a ‘less is more’ approach but having walked around and seen some of the wonderful pieces others were working on I decided to throw caution to the wind and create a ‘more is best’ piece.
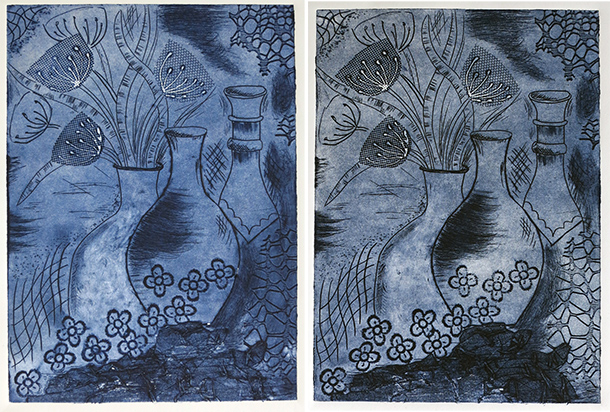
 Herewith the two finished prints. Slightly different levels of rubbing back on each, highlights on vases made with my silicone gloved finger tips, items were both embedded and adhered to the surface. The nail varnish pen has created a wonderful ink resist to form the bright white flower stamen. Ink ratio of black to blue altered between prints.
Very happy with the results and a wonderful experience and many, many new techniques learned and trialed. What I like about this print style is that it is part relief/collagraph and part intaglio. Different colours can be applied to specific sections using a small scraper/credit card, then blended with others, as the plate is rubbed back, to form a very cohesive colour rich, single print pull that has the appearance of a complex layered piece.
Note: “Tombo” by Jet James, pictured above, was purchased by myself from the artist and later professionally framed.
Permission from the artist obtained to publish this image.


Pingback: Print 1. Project 12: Representational collatype collage prints | TactualTextiles
Pingback: Print 1. Assignment 4: Review | TactualTextiles
Pingback: Print 1. Projext 13: Monoprinting experimentation | TactualTextiles
Pingback: On seeing for yourself…. - WeAreOCA
Interesting! If it’s not a “trade secret” can you tell me which nail pen you used?
Hi Dinah, no it’s not a trade secret but I can’t tell you exactly.
I grilled Jet on his pens, because they were superb, but he was a bit vague. He picked them up off the internet somewhere. I’ve searched and searched for nail art pens like his but can’t find them. However, here are the details:
They were double ended. One end was the normal nail brush you would use to apply varnish to your nails. It unscrewed as usual.
The middle of the pen was a squashy plastic which, from memory, I think was clear so you could see the nail varnish inside.
The other end was a fine tip similar to a mechanical pencil where you press the end and the lead comes out. In this case the tip obviously had the nail varnish stored in it and because of the viscosity of it you could use it to draw. Perfect for nail art.
I just can’t find the same thing. I’ve seen similar items on the internet in the USA but not with the two ends as I’ve written above.
If you find one please contact me because I’d love one. Jet had a few colours, not that it made any difference to the results but some were easier to see than others.
Thank you. I have a friend in America who has a mass of cosmetics for theatrical shows so she may well know.I’ll ask.
I have used one of those glue pens in collagraphs.I think they are just PA with a skinny nozzle!
Ah, a glue pen is also a good idea!
Pingback: Printing: Collagraphs | TactualTextiles
Pingback: Exercise 4.2.3 – Collatype printing (part four) |